Grow Plants in Mason Jars
 The Aerogarden…
This post may contain affiliate links.
Last Black Friday I bought myself a birthday/Christmas gift. A six-plant Aerogarden in red. Ever since moving to Colorado I haven’t been able to grow anything. I’m like the Grim Reaper of gardening. A friend of mine had an Aerogarden. I saw one in the store and I thought I’d try it. Why not. Six-plant Aerogarden
O.M.G. This thing is amazing! Sprouts came up quickly & grew at such a fast rate I was astounded. And it was so easy for me. Fill the reservoir every two weeks & ignore it. I could do that!
But…. Then I wanted to grow more. More! But there was no more room. All six planting thingies were filled. I sure wasn’t going to spend $120-$180 on another unit.

So I started researching DIY hydroponics. During that time I also decided to start some sprouts.
Long story short, though the sprouts did well, it was too hard to transplant into the hydroponic system, so I just gave all my sprouts to my neighbor & started over.
No biggie.
After researching, I decided on trying three different hydroponic methods to see which would work best for me. This is one of them… The Kratky method. It’s a hands-off method that does me well since I’m lazy. 😉
Supplies needed for the Kratky Method of Hydroponics….

Since I started the whole experiment with an Aerogarden, I went with what I knew, and expanded to using mason jars (ie: the Kratky method of hydroponics) using the items I was comfortable with.
I’ll have links to everything in case you are interested in trying this for yourself. 🙂
The plant food I am currently using is Miracle Gro’s Aerogrden food that came with the refill kit I purchased. But, you can use any nourishing liquid plant nutrient that is made for Hydropinics. (About $10 for a pint. You use 1 capful for every gallon of water… very little!) Plant nutrients: pint / quart
PH plays an important part in keeping your plants healthy. The water that comes out of my well is almost balanced. I just need to add a bit of lemon juice to it. (Free since I have a HUGE bottle in my fridge for lemon water.) I get it at Sam’s Club.

You need mason jars. Either pint or quart-size depending on how big your plants will get. ($8-16 for 12 jars for new. Cheaper if you can find them at a garage sale.) Regular mouth pint canning jars Wide-mouth canning jars
You’ll need seeds of course. I get my seeds through a subscription service. They are non-gmo, and I get 4 packs for less than $3 a month. (Let’s say $1 for the seeds)
If you’d like to check out where I get my seeds, it’s called Seeds of the Month Club from AveragePersonGardening.com If you decide to join, my referral code is W6S6PDI30Z (I’ll get some free seeds if you use my code!! hint, hint)
 The growing medium I am using here is made for the Aerogarden system, and I am ‘crafting’ it to use in the mason jars. It’s called Sphagnum peat moss. You can use other medium which I will explain later. (This was the refill kit I purchased. $18 for 70 peat mosses plugs AND 3oz of food) *Update: This is my favorite medium after trying several. Areogarden starter refill kit
The plastic cups are also made for the Aerogarden. (I purchased 50 for $20, but other, cheaper cups can be used.) Since I was just learning, I went with what I knew. These are used to hold the peat moss & seeds in the jar to hang into the water. You don’t reuse these (unless your plant dies). They stay in the jar for the life of the plant so you’ll need as many as you plan on sowing. Off-brand grow baskets to fit Aerogarden

To get the cup to fit on the top of the mason jar, I cut a piece of thin cardboard (from a cereal box). And cut a label out of cardstock. You can buy additional labels from Aerogarden, but it was an expense I didn’t really need to procure. (Free)
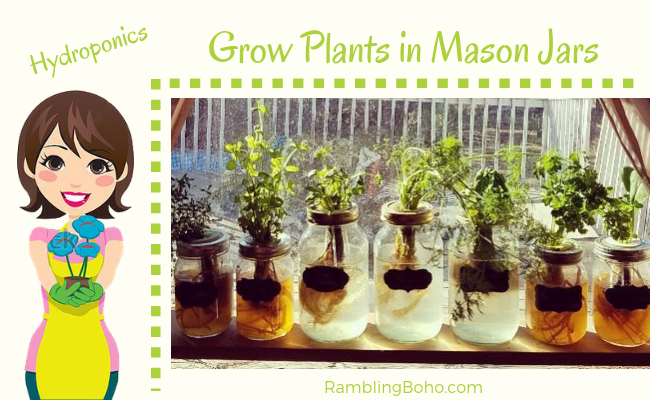
You can see the complete set up with the jar, water, cup, moss, cardboard top, label and plant in the picture to the right.

From seed, 12 day old radish.
I also use an LED grow light for the plants. The grow lights have white, red & blue lights. stimulate plant growth by emitting a light appropriate for photosynthesis. You can also get fluorescent ones. (These run about $10-$30). They are amazing! LED grow light
You can also do hydroponics outside, but it’s winter here in Colorado so that’s not an option right now. It was 17 degrees this morning. Last frost isn’t until May 15th here. So lights are a must! LED Daylight light (not grow light)
Using this method, the sprouts grow FAST. I’ve read that they will grow 2-4 times faster than in soil.
I am getting algae from the light, however, and need to paint my mason jars black. I tried using some barley straw I had from when we had a pond, but it’s not working. I don’t want to use pennies as that puts heavy metal into my food. So, painting the jars black will be the best thing to keep the light out of the water. The light just needs to hit the plant.

Using this same method, I have expanded my experiment beyond the Aerogarden stock items.
Recently I purchased 3″ baskets that fit exactly into wide-mouth canning jars. These hold the grow medium & seeds. They are made so the plant’s roots will grow out of the slots in the cup (These were $9 for 25… but you can get them cheaper if you buy more of a bulk purchase) There is no need to cut a piece of cardboard to fit the jars with these. Just drop in & screw the band on. 3″ grow baskets for wide-mouth jars
The medium shown here is called Leca Clay. They are little clay balls that hold water which the plants get their water from. Leca Clay
You can use many different forms of growing media… Perlite, Rockwell, sand, pebbles, peat moss, or coco husk. I’m experimenting with coco husk right now. I have Rockwell being delivered tomorrow, and I’ll get some perlite next time I go to town. Rockwool

Besides the food & seeds, that’s all you need for this setup.
My plants grew so fast that I didn’t have time to thin the sprouts. At 20 days, these radish had grown into 5 bulbs! Woops. Lesson: Don’t plant so many seeds. LOL
About the Kratky method…
The very bottom of the cup is touching the water when the seeds are planted in your medium so the medium (and seeds) stay moist. Once roots grow, only the roots should be in the water, not the basket/cup. As the water level goes down, just fill the jar up with more water to the appropriate level. This method gives the plants their needed water, food, and air.

Two harvests of dill. One at 35 days, one at 48.
I have made two harvests so far with my dill, basil, mint, and parsley to keep them from getting too leggy. Only because they are in small jars and not a larger pot or in the ground.
There are several types of hydroponic systems. Six, I believe. Some use buckets, air stones, water ‘fountain’ pumps, drip lines, or spritzers. I’m currently experimenting with 3 types right now. This is by far the cheapest & easiest setup. And it works!

This system uses an air stone to circulate the air in the tub. It uses the same concept as the mason jars with the baskets, water, and growing medium. It’s just a little more advanced.
